Hi. It’s been quite a while since my last post. I had these grand plans to document my cooking during our kitchen construction and reveal bits and pieces of the reno throughout. I did that to an extent but then life got in the way. Jeff went to Amsterdam for a week, I was matron of honor in my bestie’s wedding, I was behind at work, and my mom came to visit just to mention a few things. Plus…I kind of forgot. There. I said it. Begging your pardon…
I went to a party on Saturday and several of my friends asked about the kitchen, reminding me that I had neglected to post my reveal! So, without further ado, here goes!
First, remember the before…
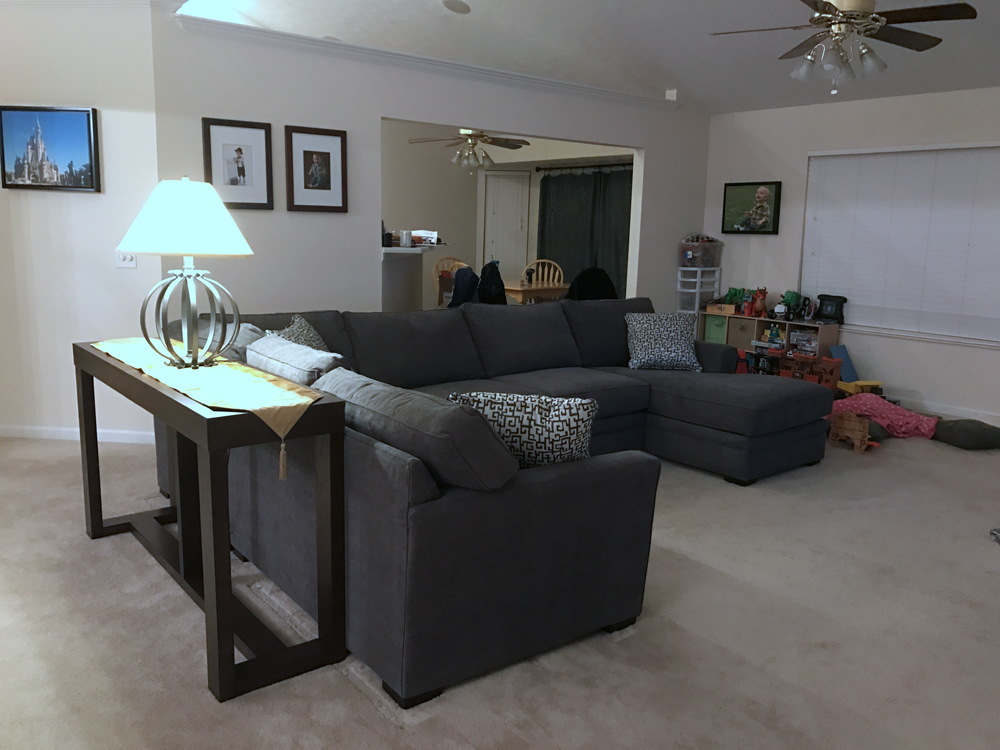
And the after from roughly the same angle:
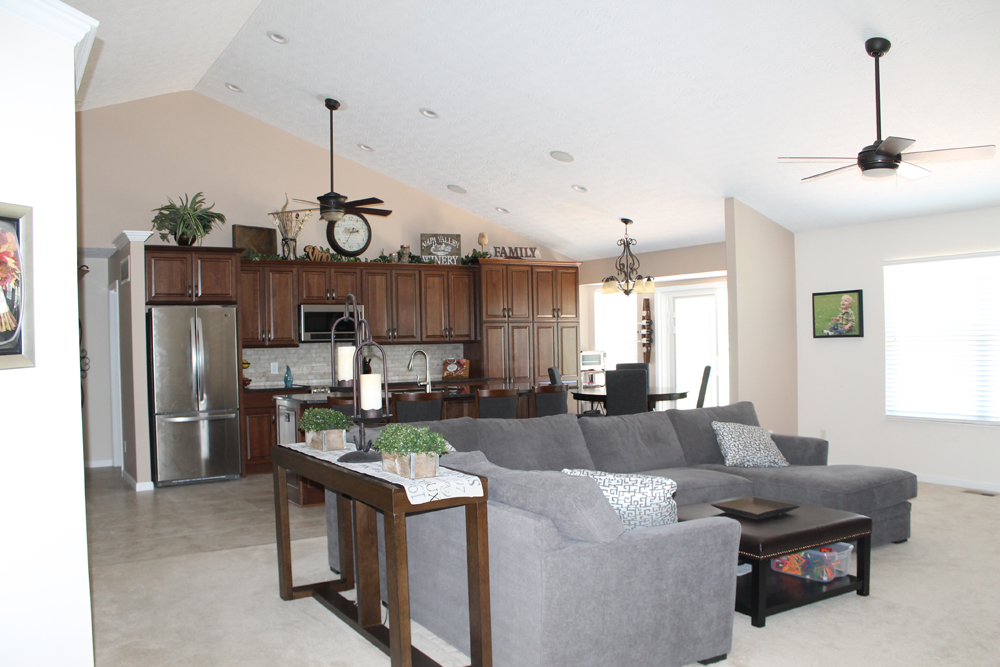 Everyone that’s seen the kitchen has commented how much bigger and more open the space feels! I mean, that’s what happens when you remove walls, but still!
 I am absolutely in love with my new kitchen.
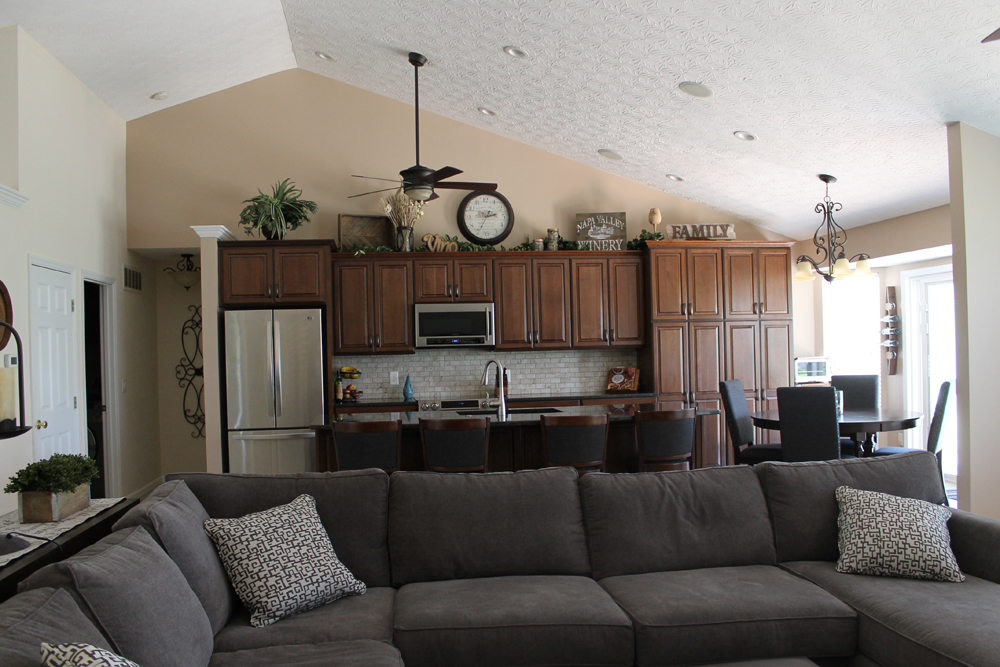
Let me walk you around and introduce you a little:
 One of my most favorite parts about the space is our huge island. I already hosted a party here thanks to Easter and it’s amazing how much easier it is to maneuver. I generally do my parties buffet style and, in the old kitchen, I’d have to set up drinks in one area, the main course in one area, the sides in another, etc. This island makes it super simple to have everything in one spot with extra space on the wall counter for things like condiments, drinks, extra food, etc.
One feature our contractor was kind enough to include was the plugs on either side of the island. When I use my Instant Pot, it’s easy to use on this counter because of this plug and avoid the steam warping the undersides of the wall cabinets. We also bought four stools that pivot (Friends, anyone?) and are quite comfortable. We’ve found ourselves eating at the bar for most meals excluding dinner since it’s so easy to wipe any crumbs straight into the sink after. With the dinner table, you have to get out placemats and then possibly sweep and use wood cleaner. This is just easier.
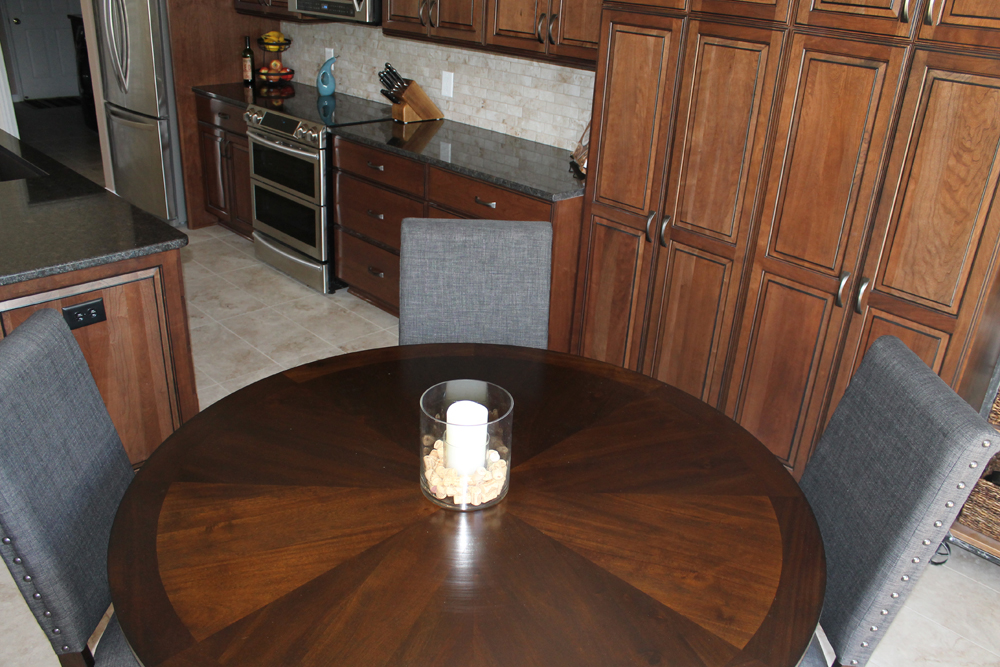 Speaking of dinner table, I love ours! It’s a two toned wooden table with four gray cloth chairs. I wanted our chairs to have cushions on them because after a long day at work, the last thing I wanted to do was sit on a wooden chair for longer than 5 minutes. We used to rush through dinner just so we could get to the couch and be comfortable. I have found we linger a little longer at this table because we are already pretty comfortable.
We kept the decorations for the table simple, opting to get a big glass candle holder and LED candle surrounded by wine corks. I love that our candle has a 4 hour timer on it so that we can turn it on at 6pm for dinner and it shuts itself off around 10. It gives the kitchen a nice ambience at night.
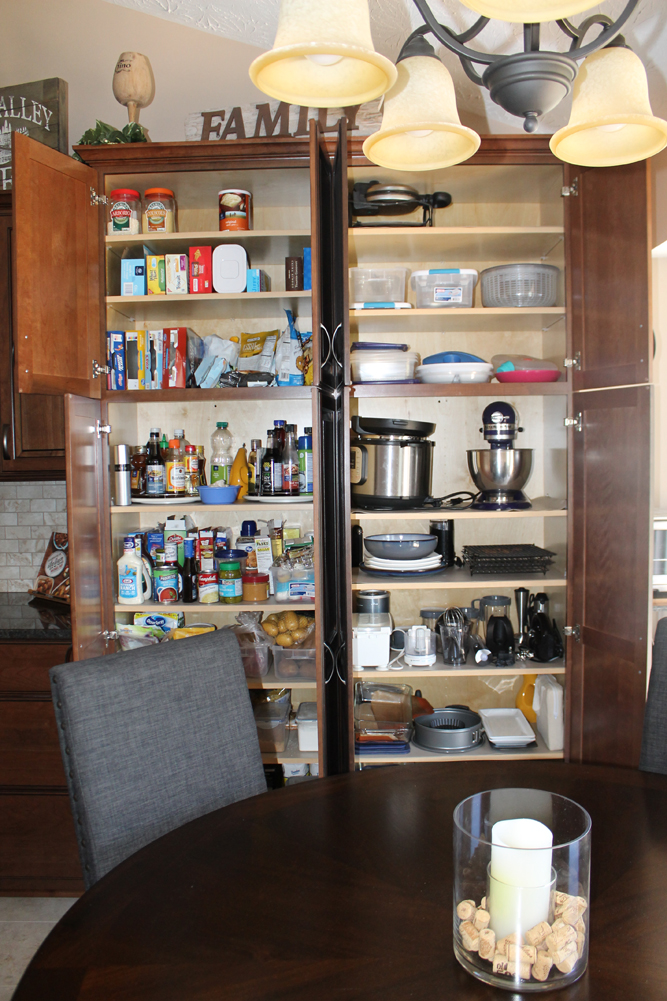
Moving right along, we come to the double pantry. In the original design, the designer had the left labeled a food pantry and the right an appliance cabinet. I thought he was right on the money, so I kept the flow. When I was first imagining my transition from the number of cabinets I had to the number I would have after, I was a little nervous that I wouldn’t have enough space, but boy was I wrong. Not only did I have enough space to hold everything that was in my cabinets prior, I was able to move some stuff up from the basement! Furthermore, my pantry in the laundry room is currently empty, waiting to be filled with things like my bread maker, ice cream maker, and panini press all still chilling out in the basement.
If you can’t remember, this is what our pantry and wall we removed looked like before:
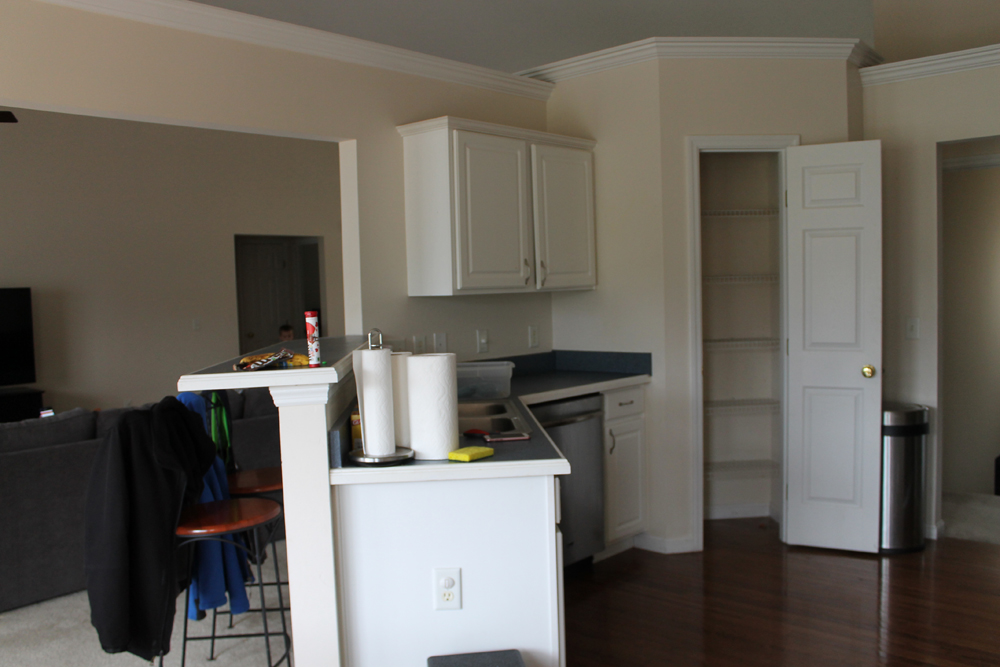
I shudder every time I look at those crappy cabinets. Ugh.
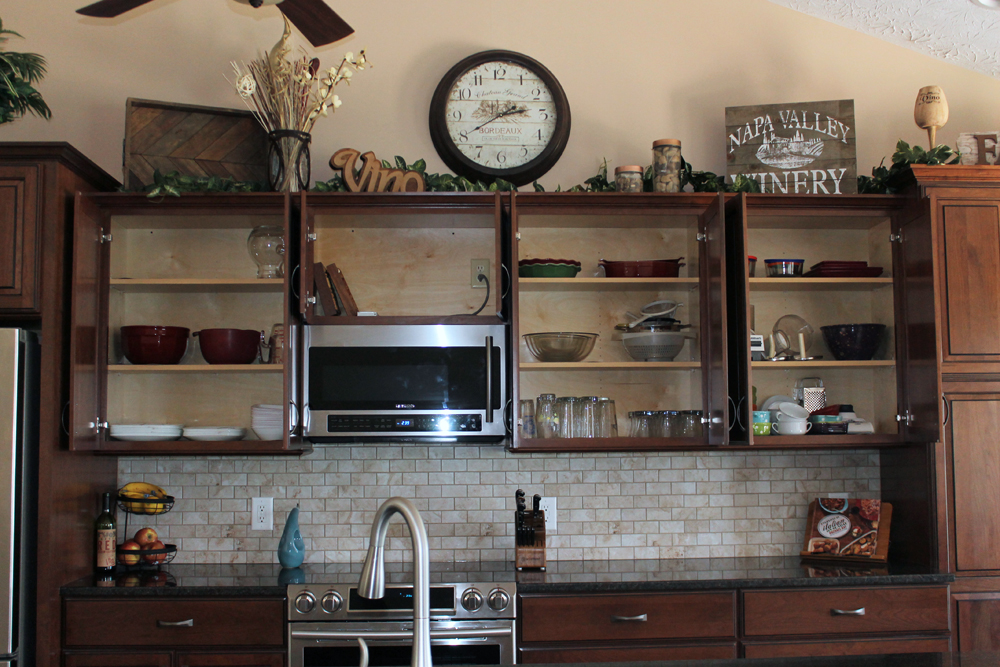 These are the upper cabinets. As you can see, they aren’t even all the way filled! I have more than enough space and could easily add more shelves if I desired. Let’s talk about the backsplash a minute…isn’t it GORGEOUS?!?! It’s probably my favorite design element in the kitchen. When we first got the counters installed, I thought they were a little dark. They are a charcoal grey with specks of brown (see picture above). I was really nervous that first night they were installed thinking I wasn’t going to like them as much as I had hoped. But then the next day the subway tile backsplash was put in and I fell in love. It just ties the whole kitchen together. The backsplash is the same stone as the floor, just a smaller scale.
These are our upper drawers. I bought some dividers at Home Goods (who could have easily sponsored this entire post), which helps significantly in keeping these drawers organized. I love that I don’t have to have my utensils on the counter (and so does Jeff…let me tell you!) and each type of utensil basically has it’s own space. It’s so easy to keep them organized, though every so often I have to follow behind Jeff and rearrange some things after he empties the dishwasher. 😛
These are our bottom drawers on the right side. I no longer have to store my cookie sheets and other such items under the oven! Plus I have all my plasticware in one spot with plenty of space for everything. I have decided if it doesn’t fit in this drawer, it’s trash. No one needs that many plastic storage containers anyway.
I love having a deep drawer for the cups too. I can see everything, it’s easy to find a lid and a straw, and I can keep track of what I have too much of (or what I need to buy!).
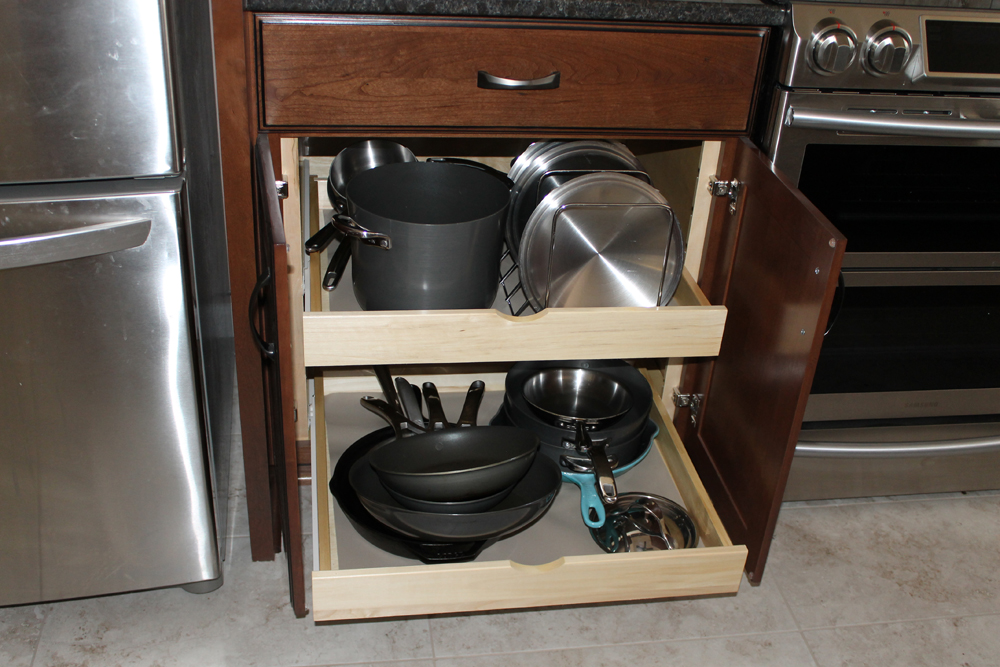 This is our cabinet on the left of the oven. It comes complete with two pull out drawers that hold all of our pots and pans. I added a lid rack for our pan lids. The only lid I wasn’t able to include in this cabinet was the super sized one for the extra large skillet, which sleeps under the oven. One thing I do miss about my old kitchen was how I had all the pans stacked in pan racks so I didn’t have to remove a stack of pans to get the bottom one out. I didn’t have a good spot to put a pan rack in this kitchen, so I opted to store them this way. It’s fine and really not a big deal, but if I had it to do over again, I might have considered other options for that reason.
Jeff was hardcore against “stuff” on the countertops thinking it would detract from the clean lines and aesthetics of the kitchen, but I fought him on some things. You can see the full layout of the wall counter in a picture above, but here’s what eventually wound up being included on top. I wanted a place for our most popular fruits (bananas and apples, which we always have) as well as my olive oil and knives. For one, I don’t like to store knives in drawers. Second, I already had my drawers organized the way I wanted. Third, I use olive oil daily and don’t really want to walk to the pantry to get it out. Fourth, they’re pretty. So I win. I also wanted to keep my cookbook holder out on the counters since I use cookbooks often. Instead of having an empty holder on the counter, I picked a cookbook that was equally as functional as it was beautiful and fitting to the decor. I chose Rachael Ray’s “Everyone Is Italian on Sunday” because she is one of my favorite authors and I agree with the title of the cookbook. In fact, I need to start having big Sunday dinner where I cook homemade pasta and invite the whole family over. I’m sure I wouldn’t have complaints. 😛
We also bought a few new appliances for our new kitchen. Going into the renovation, we knew we wanted a new stove. Our old one was white and obviously would stick out in the new space. I opted for this lovely lady. She’s a dual oven (convection on top, standard on bottom) that is WIFI enabled. Fancy, I know. I’ve tried her out a couple times now and have to adjust my cooking a little. She’s a bit hotter than her predecessor and I’m not used to cooking in a convection oven. It’s no big deal…I just need a bit more practice. Unfortunately I used her for like the third time on Easter and ended up charring the brownies I made slightly. They were still edible, but just had a little darkness to them.
Speaking of Easter, we decided to install the new microwave on Easter Sunday. Now, you might have two questions: 1. why did we get a new microwave to begin with when the old one was just fine? and 2. why on Earth did we decide to install a new microwave on Easter Sunday when the whole family was coming over for dinner that afternoon? Good questions!
When we were looking at the old microwave, we noticed that there was a secondary charcoal filter on the top of the microwave that filters any nasty particles from the food cooked on the stovetop out before it blows the steam back into the kitchen. Since we hadn’t changed this filter in over six years, it was blowing gross, greasy slime onto our cabinets. We didn’t want to ruin our new cabinets, so we started searching for replacement filters. Funny story…they don’t exist anymore unless you want to pay out the butt for them from a questionable source. So after weeks of searching, we decided to get a new microwave and stock up on filters.
Jeff didn’t want me to cook anything until we replaced the microwave but he had to go to Amsterdam the last week of March and then we got busy with life. We were talking about Easter dinner on Saturday and I told him I had to use the stove the next day. We didn’t have time to replace the microwave on Saturday so, while I was at the grocery store on Sunday, he started to switch them out. Little did we know it was going to take about 5 hours to replace. This chick was panicking to the point of crying thinking my family was going to come over and all I was going to be able to serve them was chips and salsa! Thanks to our brother-in-law, they were able to replace it and I was able to cook in plenty of time to host dinner. But there for a minute I was considering ordering pizza…
Finally, we weren’t planning on buying a new toaster oven, but Jeff said the more he thought about it, the more he wanted a toaster with an automatic shut off. I wanted one that had a digital timer and multiple settings for various foods. So I bought my first Breville appliance. If you know anything about Breville, you know they aren’t cheap. It was the most expensive toaster oven I have ever purchased, but in my limited time using it, I can honestly say I’ve never had such a positive experience with a new appliance. It does everything we want it to do and more! I would recommend it to anyone who uses their toaster daily for more than just toast like we do. (We use it for toast, heating up side dishes, reheating leftovers, etc. Basically anything we want to heat up in the oven without having to use all the energy the oven requires.)
Back to the reveal!
Another favorite part of the kitchen are the spice drawers! I knew I was going to need substantial space for my spices. Originally I was thinking I would need to dedicate a shelf in the pantry to them, but as I was organizing my kitchen, I realized I had three drawers with nothing earmarked for them. Voila! Spice drawers! I topped them off with a new utensil holder from…you guessed it…Home Goods. One thing I love about our drawers is they are fully visible meaning they slide all the way out. In our last kitchen, there was about a 1- or 2-inch space that you couldn’t see and you just had to reach under to get what was stored there. We ended up putting our small forks and serving pieces in the back of the utensil drawer because we rarely used those things.
Rounding out the last of the cabinets on the island are the trash/recycling drawer (LOVE!), the cutting board/Rachael Ray cookie sheets drawer (buy these RR cookie sheets and thank me later), and two “junk” drawers I haven’t decided what to do with yet. Right now they are literally junk drawers, but eventually I’d like to dedicate them to something specific.
BTW, has anyone tried Blue Apron? I was gifted a free week to try and I had mixed reviews. I LOVED the Shiitake Mushroom Burger recipe I got (pictured on the recipe card in the far right picture), but the other two recipes were just meh. I was so grateful to my friend, Shannon, for letting me try it though! I am trying Hello Fresh next week and comparing the two. We will see how it goes!
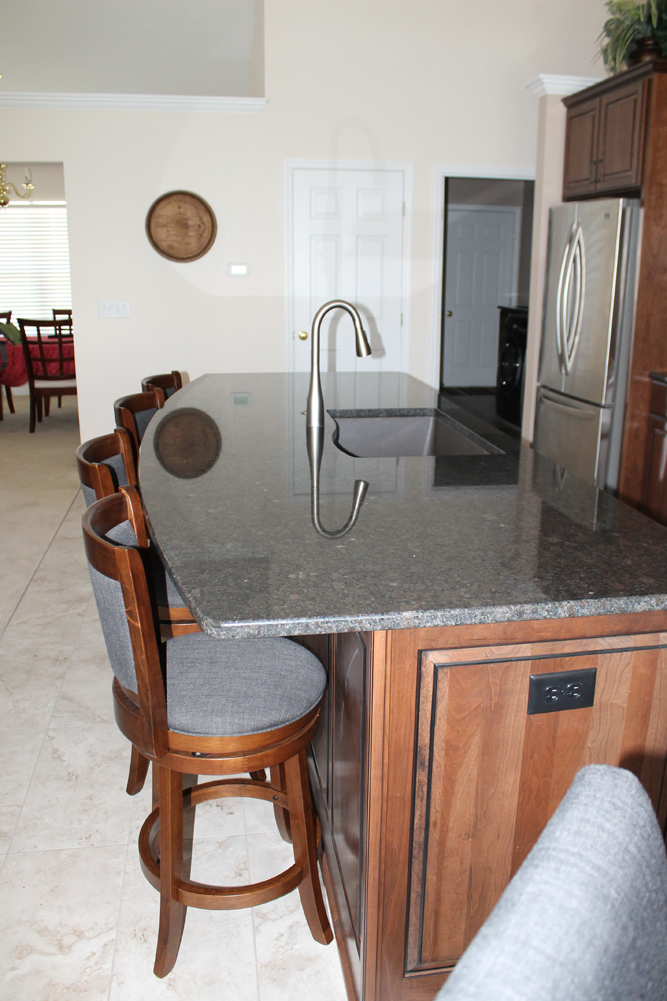
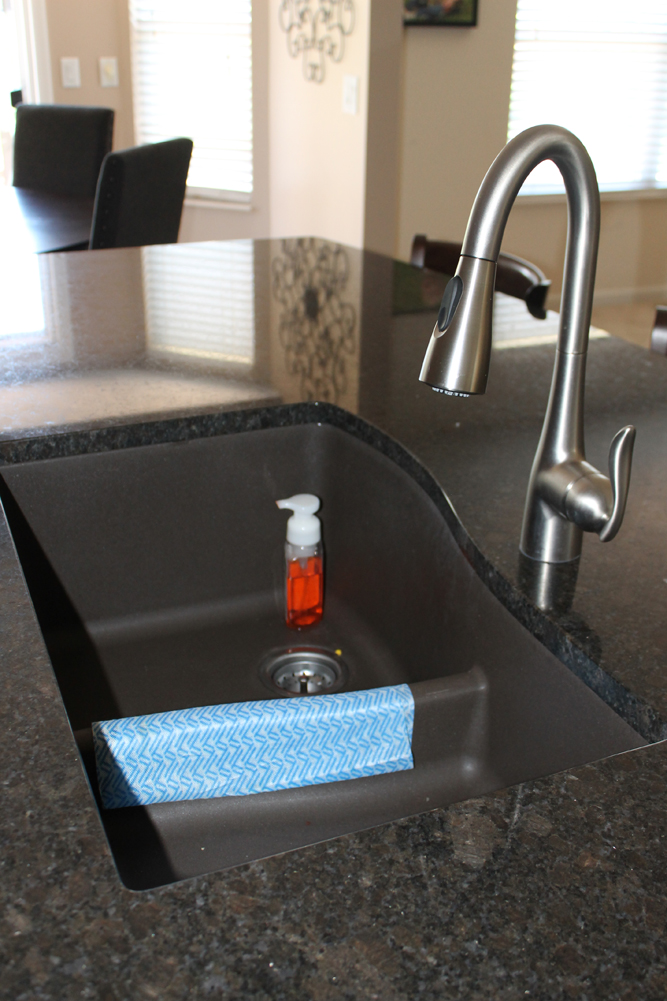 The last design piece in the new kitchen is the sink. First off, I LOVE the color. It’s so dark and matches so nicely. It’s awesome. It’s a 60/40 sink which took a little getting used. I was initially annoyed with the disposal on the righthand side, but I got used to it. We aren’t allowed to keep the soap on the counter, so it lives in the sink. Honestly I haven’t even noticed it and I love the clean look of the counters.
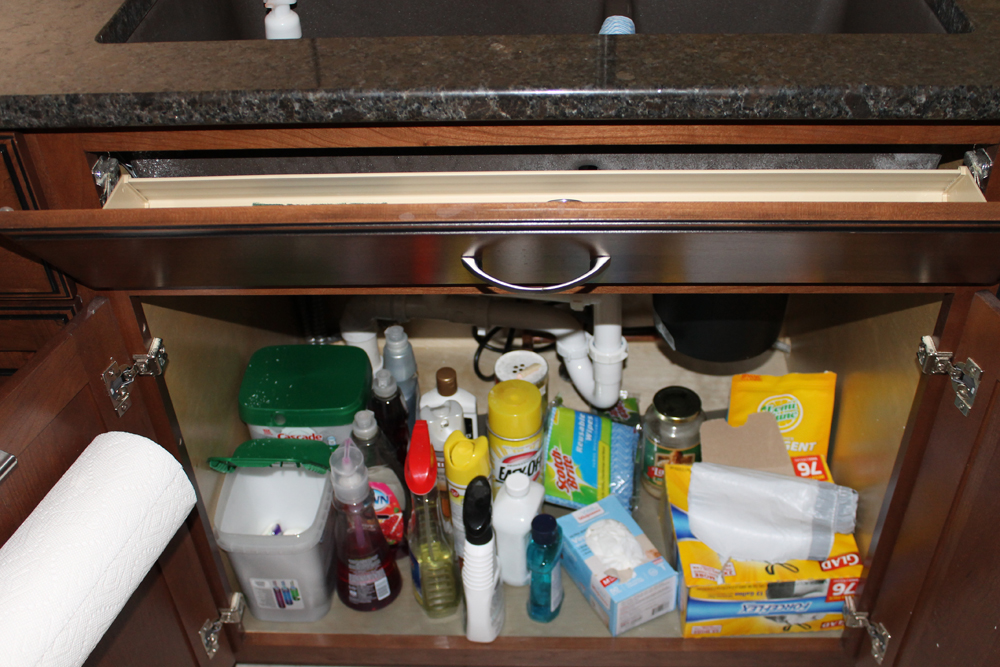 Our sink has a pull out spot for the sponges, which is pretty typical these days. We also bought a holder for the paper towels to hide them from view as well. I am still planning on getting some sort of storage for under the sink so it’s not as jumbled, but for now it works. We did, however, get a plastic mat for under the sink in case we have any chemical spills.
We were able to finish our laundry room as well. Most of the work had been done already, but we had the counters installed, the outlets raised above the counters, and a new sink put in that matches the kitchen sink. We wanted the two rooms to be complimentary since you can easily see them from each other. We had our flooring flow from the laundry room into the hallway and throughout the kitchen as well so we didn’t have to worry about keeping the hallway clean, which was a huge challenge. To be honest, I would love if we had tile throughout the main living area. When we get to the point of replacing our existing flooring in the family room, I’m definitely going to consider it.
You’ll notice my Keurig is now in the laundry room. It’s the whole maintaining clean lines and limited counter “stuff” initiative. It was basically my compromise for being allowed to have what I have on the counters now.
As I mentioned above, we now have a nearly empty pantry in our living room. Initially, we put this in to serve as an overflow for our kitchen, but I realized I’d rather have my overstock food in the basement and put kitchen tools in this space. I still have to move some appliances up from the basement, which I plan to do when I put the basement back together in the next week or two. I had to disassemble parts of the basement to make it functional for our cooking during the renovation.
The rest of the cabinets in the laundry room include my cookbooks (I have a problem), the cleaning supplies under and above the sink, and the laundry supplies/coffee cabinet. So far, it’s been extremely functional and I wouldn’t change anything.
Finally, we’ve been working hard on decorating. In the last 6 weeks, we’ve probably made 15+ trips to Home Goods and have purchased and returned more than I care to admit. Some of our receipts have three or four additional receipts stapled to them from where we have returned multiple items. But out of all those trips, here are some pieces we are keeping.
As you can tell, we really like ironwork. I think the iron decorations add a design element of whimsy and fun to the space. We have a subtle Italian theme throughout the area, so I wanted to have some sort of wine bottle holder included. I found the top middle piece and fell in love. It’s a wine holder made from the sides of wine barrels. In addition, I love the map of Italy carved into the top of a wine barrel. It’s hard to see because I took a head-on picture, but if I were to show you the side, it has a metal band around it and you can tell it’s from the top of a barrel.
We didn’t want to have our toaster on the counter, so I found this rack to put on the end of our appliance cabinet. It was the perfect fit and exactly what I was looking for. I bought a couple wicker baskets from Michaels to hold our bread and the extra cooking sheets for the toaster. I’m not super thrilled about the sheets being in the basket as they don’t fit well, but for now it works.
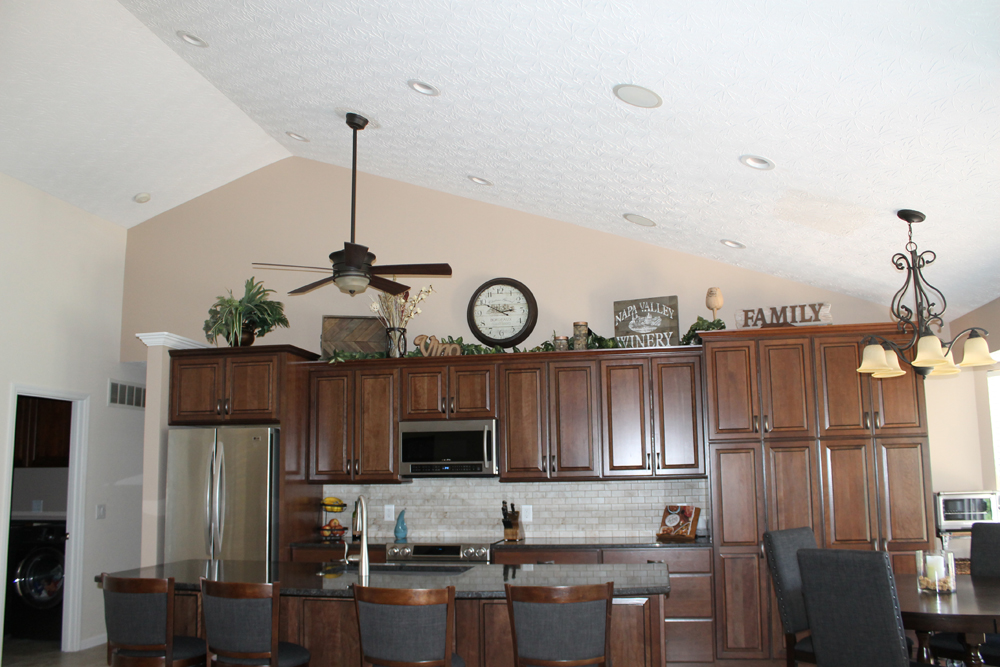 Finally, when my mom was visiting last week, our project was to finish the top of the cabinets. I’ve got to say, coming from someone who doesn’t really feel like decorating is one of her strengths, I love what we did. It’s kind of hard to see in this picture so I took a couple closer shots (click on them to enlarge them):
I wanted there to be a lot of wood and rustic touches included as well as some plants and greenery. I love the metal of the candle holder (which I turned into a vase) as well as the wooden WINERY plank sign. And I fell in love with the tray on the lefthand side the minute I saw it. This whole setup came from Home Goods and Hobby Lobby. I wasn’t a huge fan of either of those stores before this process, but now I’m bought in!
Here is my overdue and extremely long winded overview of our new kitchen. I hope it was worth the wait!
(BTW, I was not sponsored by any company…I just wanted to share where I got my items and talk them up since I had such great experiences with each company.)


 We weren’t ready to wind down right away after the show, so we walked over to Fourth Street Live! to check out Howl at the Moon. Guys, this place was SO FUN! I had seen several of these in various places I’ve visited, but I’d never been to one. I was amazed at how talented the band was on the stage. Each musician played every instrument as well as sang their asses off. I loved it so much! We danced and sang our hearts out until we could barely stand up anymore.
 We called it a night around midnight and headed back to the hotel where we goofed around for a bit, snacked, and laughed even more before bidding each other good night.


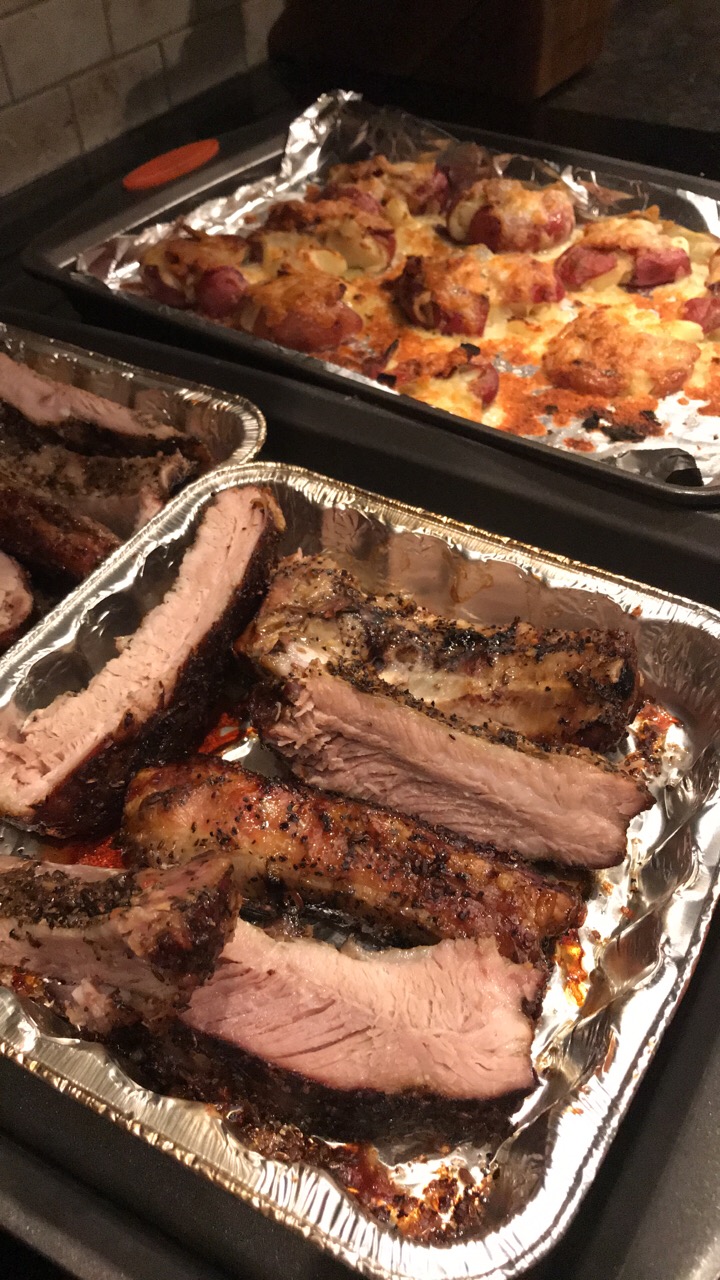


 If you ask my boys, they’ll tell you we rarely have the same thing twice. I have a handful of favorite recipes that I make over and over again, but usually I’m scouring the internet and my cookbooks looking for new and different things to try. Sigh…I miss my cookbooks, packed away until the kitchen is completed. The boys often have to request a meal they miss if they want me to make it again. Jake has meatball subs in the request pile right now actually.
 You see, not only am I cooking without a kitchen, I’m trying to lose a couple pounds before my best friend’s wedding in early April. I’ve done a decent job so far, but to be honest I’m starting to lose track a bit! With a night of burger eating in my future, it’s not looking too good… Yikes!
 Korean Beef Bowls
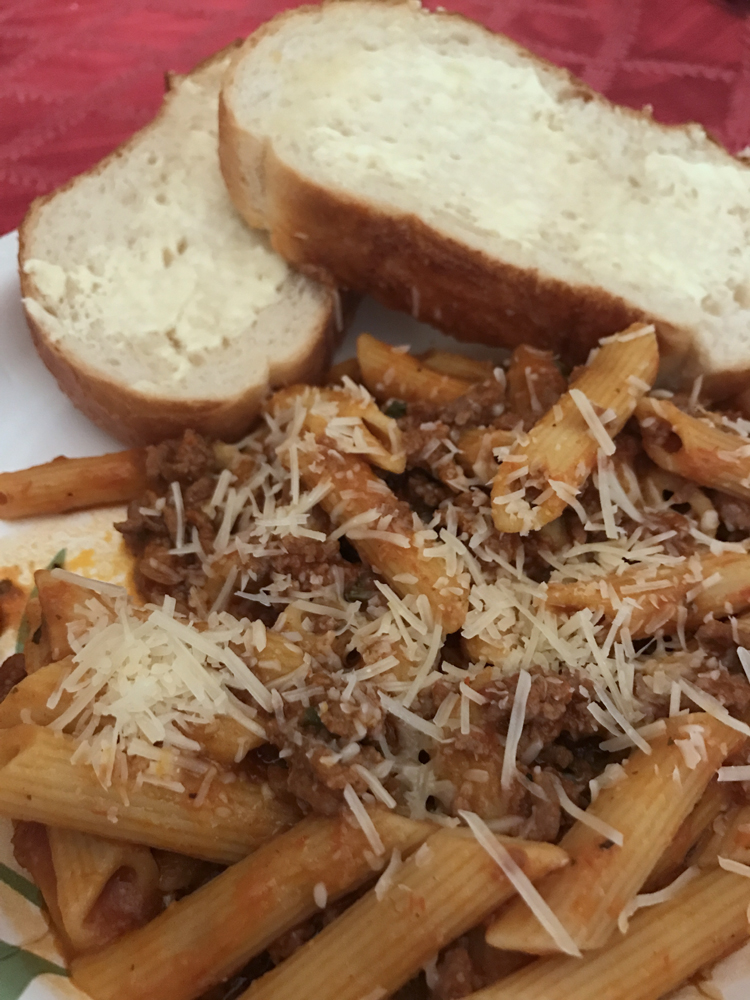 Have you ever come home from work and thought, I’m way to tired to stand over the stove making dinner. Girl, me too. It happens all. the. time. But I just can’t make myself order takeout night after night. Not only am I trying to lose weight, but we are trying to save money since we’re basically redoing our entire main living area.
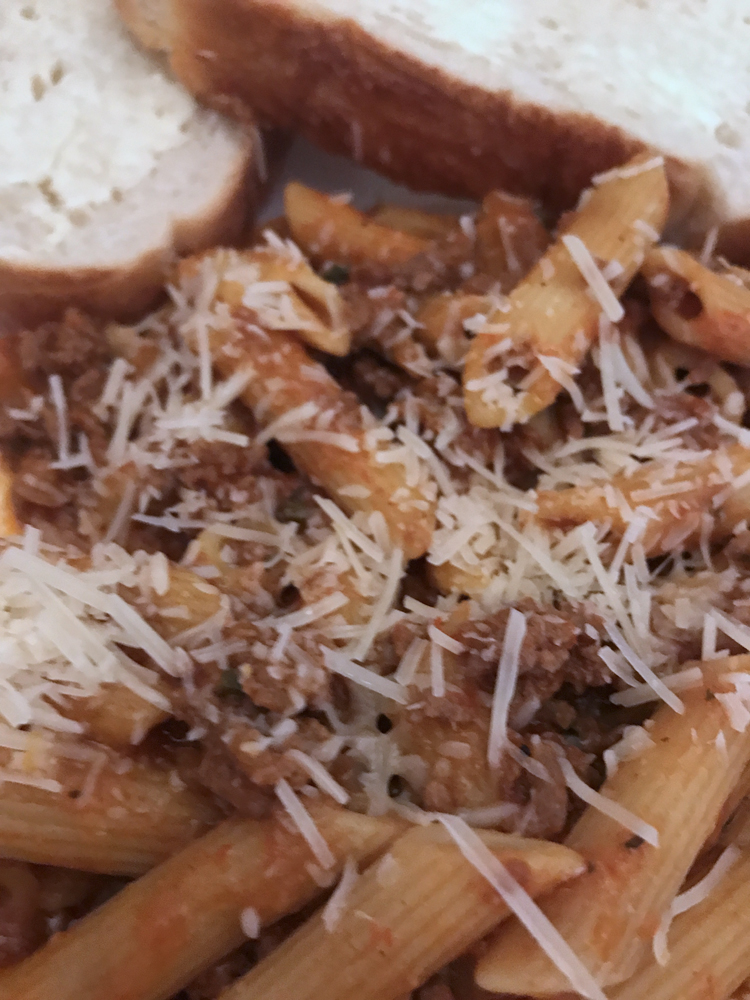 Instant Pot Pasta with Meat Sauce
 Let onion cook for a few minutes before adding your beef. Cook beef until brown, using a spoon to break up the meat along the way. Once meat is browned, drain if necessary. Add beef back to IP.