After nearly a year without a blog post, I started getting that itch again. That itch to be creative and share with the world. So here I am…sitting quietly on a Saturday morning, coffee in hand, contemplating what my newest blog post should be…if I were to start back up again.
No one get your hopes up. It could be like last year when I posted a handful of new things and then went dark again.
The problem is you never know how busy you’re going to be or how much energy you’ll have. One of the biggest tips every blogger or youtuber will tell you is consistency is key. That’s why I had originally decided to post on Tuesdays and Fridays. But, honestly, it was so much better when I FIRST started my blog. I posted when I felt like it. And it seemed more authentic. I wasn’t posting things just to stay on a schedule. I posted things I actually wanted to share with the world.
I mean, you don’t schedule Facebook or IG posts, right? You post things in the moment when you have something you want to share with people! So maybe that’s the key? Who knows. All I know is that I have something I want to share today and I don’t care about consistency and schedules anymore.
So this may be the only blog post for 2018 or it may be the start of something great. I guess only time will tell! So…on to the ribs!
Whenever I meal plan for the week, I typically ask the boys if they want anything special for dinner. Normally I don’t get an answer, but last week Jeff asked for ribs! Perfect timing as one of the days I was planning for was Super Bowl Sunday! I had originally planned to cook them in the Instant Pot (turns out amazing btw), but when he said he wanted to smoke them, I obliged. And guys…they were out of this world!!

Smoked Spare Ribs
1 rack of spare ribs, trimmed*
Steak seasoning (I prefer the one from DLM, but any mesquite or steak seasoning will do)
Foil pans that fit in your smoker
1 bottle bbq sauce
Trim the ribs of most of the excess fat and remove the membrane if you desire. The membrane is that silvery thin skin looking piece that’s on the bone side of the ribs. I have difficulty doing this sometimes and the membrane doesn’t really bother me, so I don’t always remove it. Season ribs liberally with steak seasoning. Let ribs come to room temperature for about 30 minutes while your smoker reaches the internal temp of 225*.
Place seasoned ribs in the foil pans. I used two 8″ square pans and had to cut my ribs in half to fit. You can also put the ribs directly on the racks in the smoker, but I’m lazy and don’t like to clean, so I left them in the pans.
Smoke ribs for at least 6 hours or until the internal temperature of your ribs reach 190* so they fall apart. We ran out of time and the ribs were about 170*. They were still amazing, just a little bit chewy at this temperature. You definitely want to reach 145* so they are completely cooked through.
Add wood chips to your smoker every 1-2 hours. The more wood chips you add, the smokier your food will taste.
Some people suggest covering the ribs in foil after 2 hours so your ribs don’t take on that much smoke, but we left them uncovered and liked how smokey they were. I guess it’s a matter of preference.
Once your ribs are cooked through, remove them from the smoker and cover them with bbq sauce. I like to broil my ribs after I’ve sauced them, but it’s not necessary. If you want to do this step, broil your ribs in the oven for about 5 minutes or until the sauce gets a little caramelized.
This night I served them with Flo Lum’s smashed potato skins, which were equally as amazing and so easy!!!
*It was just Jeff and I eating the ribs, but obviously you can use as many racks as your smoker can hold. Also, we got our ribs at Aldi for $8! That’s the cheapest I’ve seen ribs and, guys, they were tasty!
If you want a great recipe for Instant Pot ribs, check out this guy! His recipe works wonderfully!
Speaking of Instant Pot recipes, would you be interested in seeing videos of the different recipes I’ve made in the IP? I’ve thought about filming some of them. Have a great weekend!
 If you ask my boys, they’ll tell you we rarely have the same thing twice. I have a handful of favorite recipes that I make over and over again, but usually I’m scouring the internet and my cookbooks looking for new and different things to try. Sigh…I miss my cookbooks, packed away until the kitchen is completed. The boys often have to request a meal they miss if they want me to make it again. Jake has meatball subs in the request pile right now actually.
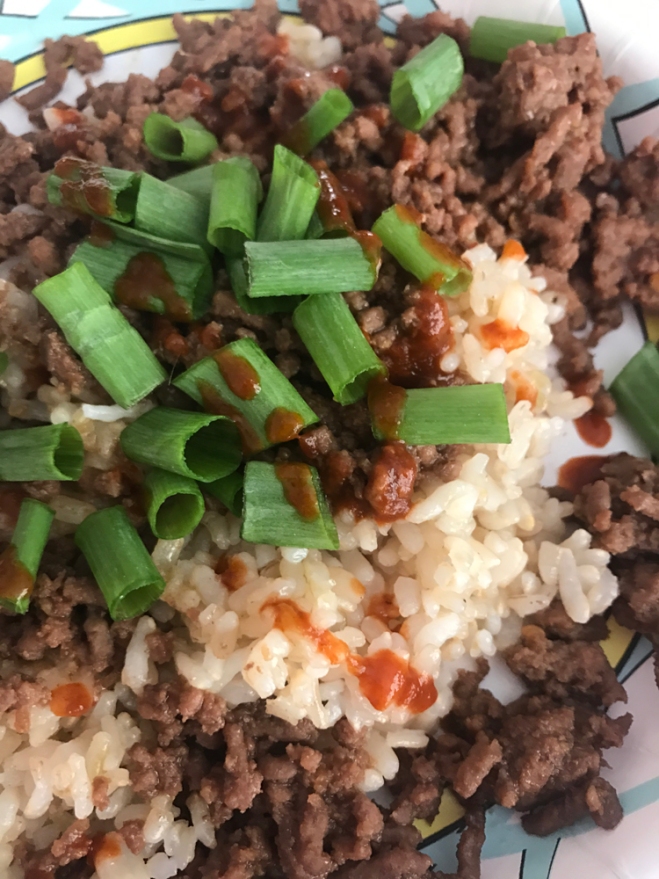 You see, not only am I cooking without a kitchen, I’m trying to lose a couple pounds before my best friend’s wedding in early April. I’ve done a decent job so far, but to be honest I’m starting to lose track a bit! With a night of burger eating in my future, it’s not looking too good… Yikes!
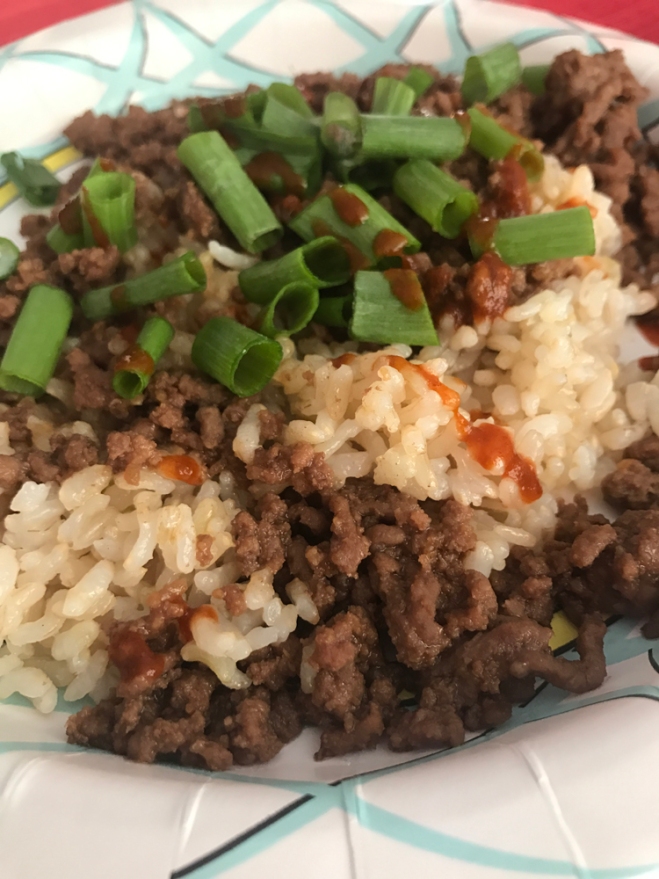
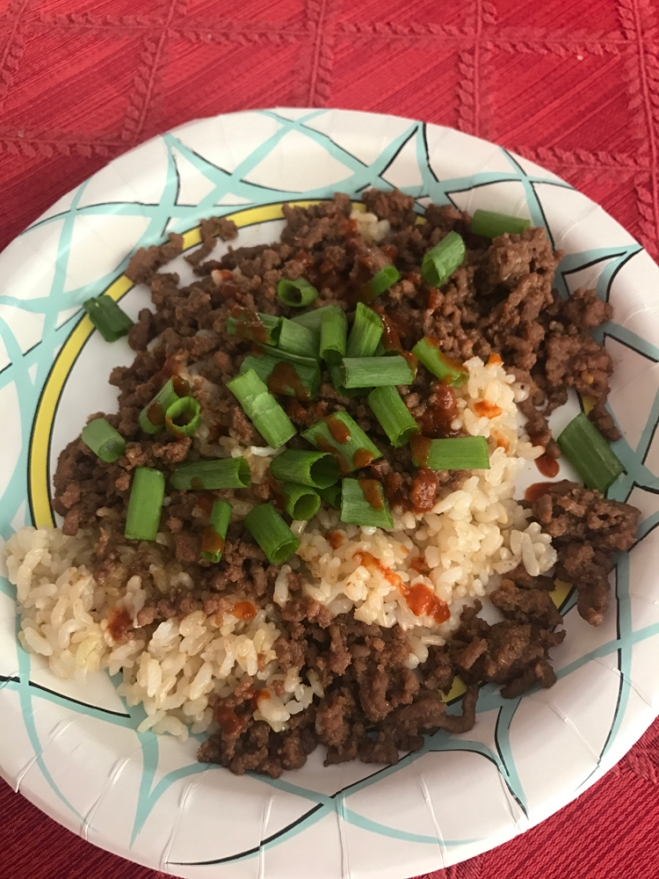 Korean Beef Bowls
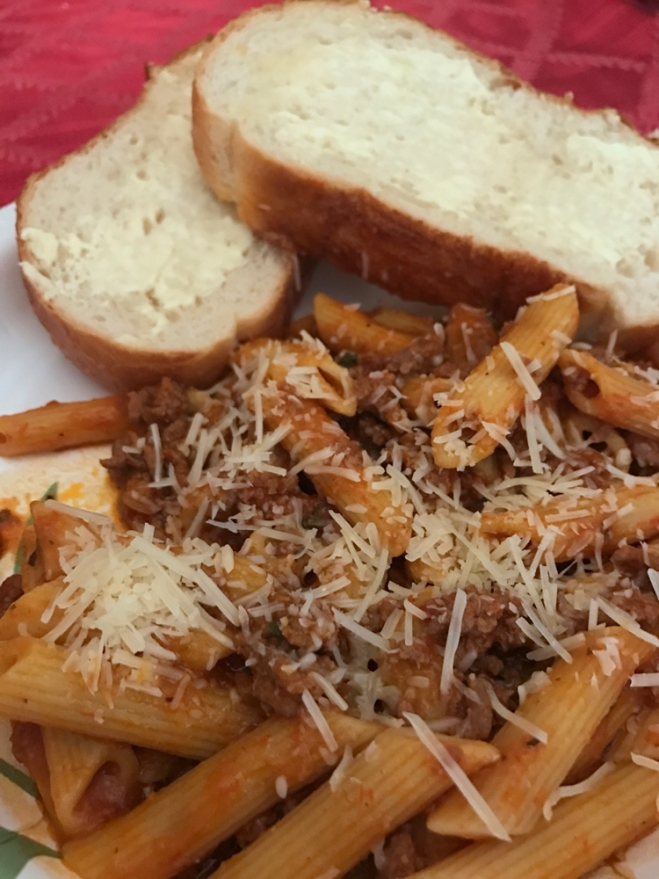 Have you ever come home from work and thought, I’m way to tired to stand over the stove making dinner. Girl, me too. It happens all. the. time. But I just can’t make myself order takeout night after night. Not only am I trying to lose weight, but we are trying to save money since we’re basically redoing our entire main living area.
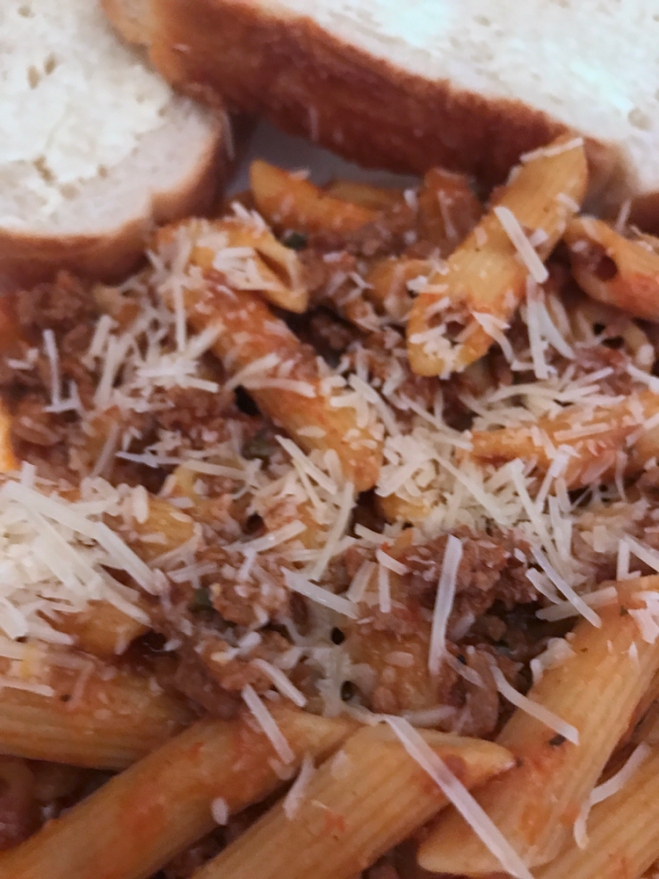 Instant Pot Pasta with Meat Sauce
 Let onion cook for a few minutes before adding your beef. Cook beef until brown, using a spoon to break up the meat along the way. Once meat is browned, drain if necessary. Add beef back to IP.